Been pretty busy lately with work and only just manage to squeeze a little time for a small update!
I have a few CRS passing away due to a erratic change of plants in my tank, hence a visit to the LFS to get 10 Mosura Crystal black shrimp has to be done!
I will do a photo update tonight of the new boys!
cheers

Friday 16 December 2011
Thursday 1 December 2011
[Article] Shrimp Artificial Egg Hatching
I have stumbled onto this topic once or twice by my friends and I would like to share something that I have found on Shrimp now! I did not write this and credits to seetharam from ShrimpNow! link here Artificial Egg Hatcher
Written below is how it is done;
During the course of my experience keeping inverts, there was a time when i used to keep dwarf crayfish and when the female used to get berried I would transfer the female to a seperate tank and during this process she used to drop some eggs. In one such situation i decided to salvage the dropped eggs and try to hatch them artificially. I have often come across threads where hobbyists have lost shrimps that were berried and wanted to salvage the eggs and try to hatch them artificially. So i decided to share the contraption that i had come up with, though i dont have it with me anymore, i have shown it in the form of a diagram. I was able to successfully hatch 50% of the eggs that i had salvaged using this contraption.
Things You Need to Make This:
1. 2 Ltr Empty Plastic Pet Bottle (This has to be very clean)
2. Plastic Airline Tubing Connector
3. Airline Tubing
4. Airstone
5. Aerator
6. A Fine Mesh
How To Make the Contraption
The Diagram of the final contraption is below and is pretty self explanatory, So refer the diagram and go through the steps for easy understanding.

Step 1: Take the pet bottle, clean it very well and cut the bottle right in the middle. The top portion will be your hatcher and the bottom portion will work as a stand.
Step 2: Make a hole in the cap of the bottle such that the plastic airline connector fits snugly without any leaks or gaps. Also make a hole in the side of the bottom portion of the bottle and run an airline tubing through it.
Step 3: Place the top portion of the bottle that you have cut off in an inverted fashion into the bottom portion and connect the airline tubing and airstone as shown in the diagram.
Step 4: Take a fine mesh and place it at the open end of the contraption such that it is in a "U" shaped sack form as shown in the diagram. The mesh can be secured around the bottle using a rubber band.
Step 5: Fill the inverted portion of the bottle using water from the tank to a level such that it fills the mesh as well.
Step 6: Place the eggs that you have salvaged in the mesh. Run the aerator, you may need to control the output of the air bubbles such that the air bubbles rising up gently disturbs the mesh and hence the eggs in the mesh. This will achieve pretty much the same result of the female fanning the eggs.
In cases where you would need the water temp in the contraption to be low and your room temp is high , the top portion can be placed in the tank itself on which you have a chiller or cooling fan so that the temp of the water in the contraption will be the same as the tank. You can use a clip to secure the top portion of the contraption to the glass of the aquarium.
With that you are done, and now you have to wait. Keep a watch on the eggs everyday, If you see any eggs infected with fungus, remove those eggs immediately. Ideally you should see the eggs showing changes as they mature. I have also noticed that all eggs sometimes dont hatch at the same time, so as and when the shrimplets arrive, transfer them to a holding container or a seperate tank based on what you want to do.
Conclusion: Please remember , this is not a fool proof method to Artifical Egg Hatching and does not gaurantee that the eggs will hatch for sure. There may be a possibility that you may loose all the eggs due to various reasons like fungal infection for example. This method just gives you an opportunity to save some of the offspring. I hope this helps people on this forum.
Thanks.
[Kevyn]
Tuesday 29 November 2011
[Update] Lovely CRS in the house!
Just received a new batch of CRS, Mostly are Mosura with some having a "No-Entry" sign on them! check out the pictures of my new lovable CRS!


Sorry No-Entry to those grazing on my land ^^

Tiger Tooth in Da House?

All the food are mine!!
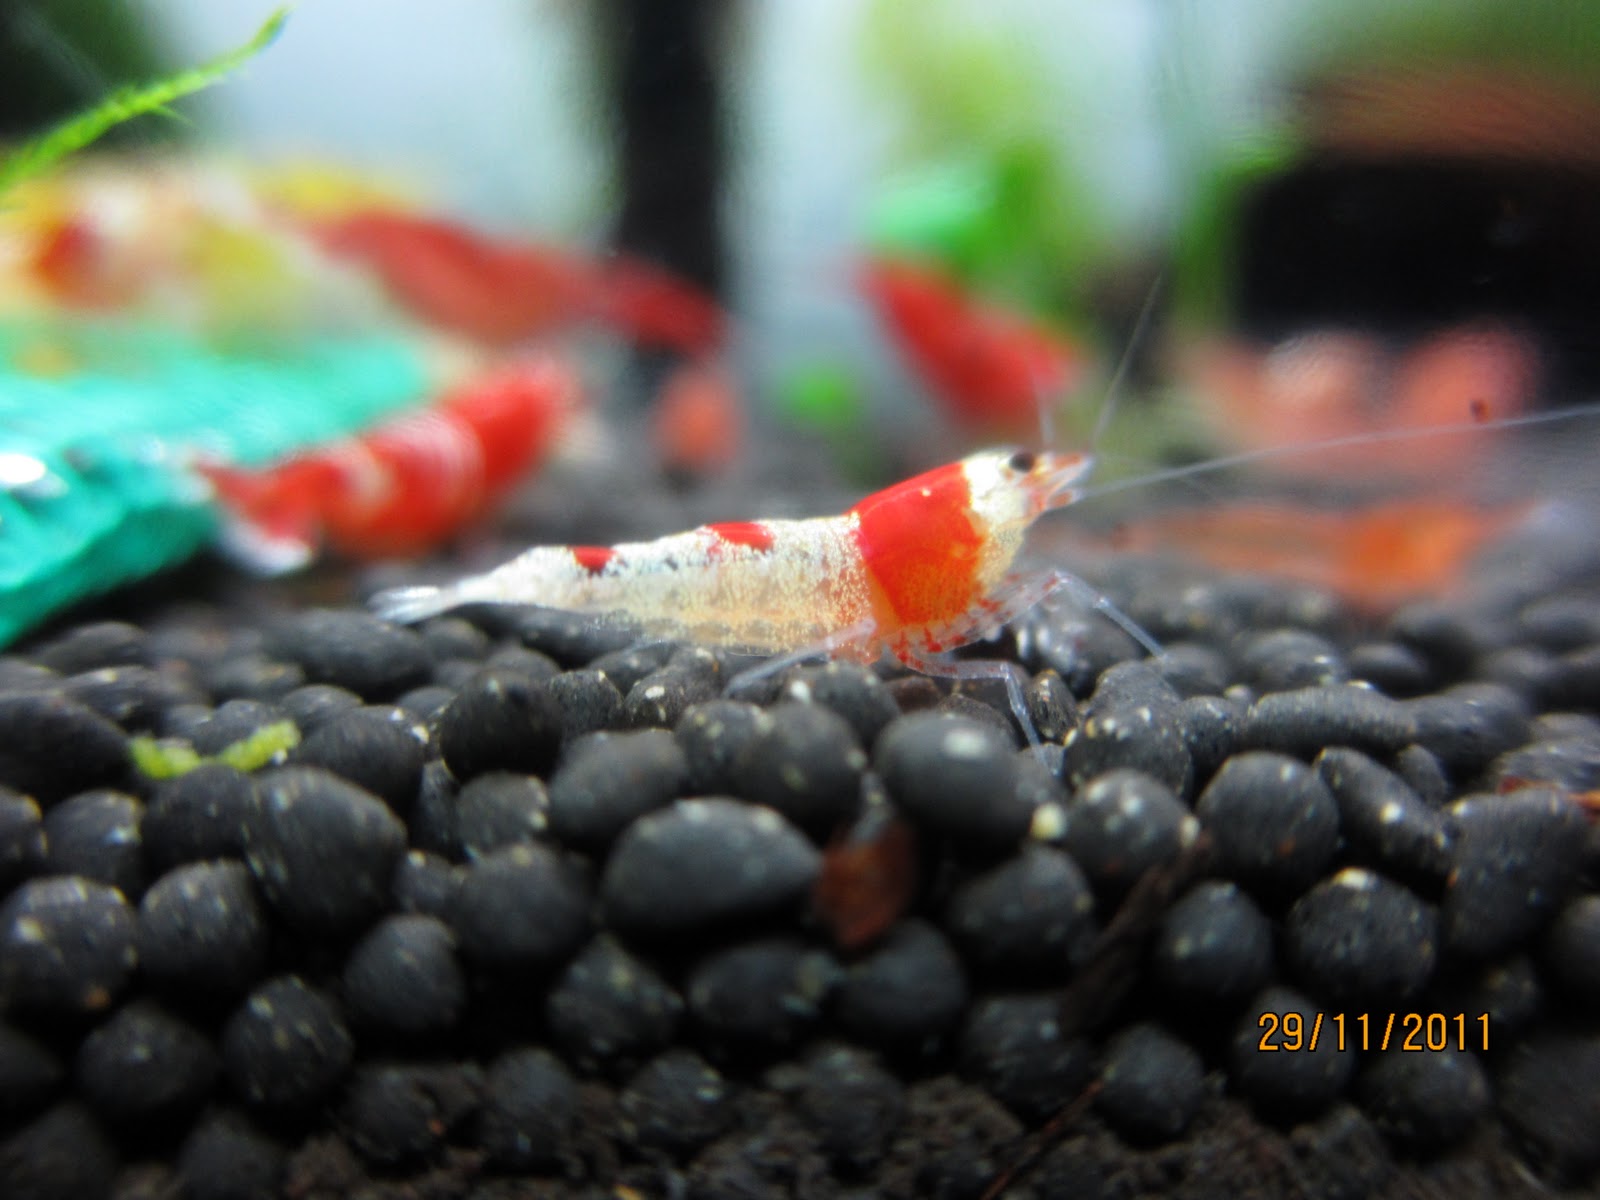
A Pale White Mosura, Maybe because they just arrived?

We Love Fissiden!

No Entry Mate!

Who is this strange fishy? Hmmm
[Kevyn]
Wednesday 23 November 2011
[Update] Feeding Time!

Red Cherry on Fissiden

Notice the smallest shrimp? it is the first baby that entered the tank since August. Growing big boy!
[Kevyn]
[Kevyn]
[Update] Video Update of my Tank
Teasing my YFS with their Favorite Mosura Specialty Food
Team Building Time!
Super Red Cherry Shrimp!
[Kevyn]
[Updates] Rainbow Berried!
Just saw it this morning, my Rainbow Shrimp Berried!

Berried Rainbow Shrimp - Photo by Ben
[Ben]
Tuesday 22 November 2011
[Updates] X'mas Moss Rewrap

X'mas moss tied to wall - Photo by Ben
My X'mas moss are tied in chunks via fishing line. They are growing real slow, not a good coverage for a wall. Therefore I followed Kevyn's [Tutorial] and did a re-wrap. distributing the X'mas Moss evenly on the whole wall wrap it up with a net which I got (1m x 1m for SGD2.50). Below is the photo after wrapping.

Re wrapped X'mas moss - Photo by Ben
As you can see, the moss are already starting to protrude the net. Hopefully after a few weeks I could show you the wall with more x'mas moss visible.
[Ben]
[Updates] New Lamp

New Lamp - Photo by Ben
My T5 Lamp broke down and my plants are not able photosynthesis at 100%. I went down to my local fish shop and instead of replacing the T5 Light, I got another PL light. I myself felt that the luminosity of PL is much higher than T5 although it emits more heat than T5. In order for my plants to grow well, i decided on PL.
[Ben]
Monday 21 November 2011
[Tutorial] Water Refilling - Drip Method
I went on holiday for about 2 days. When I returned, the water level of my tank dropped about 2 inches through evaporation and I didn't prepare any water to refill into my tank >.<. By adding tap water immediately to the tank will distrupt the water conditions and might kill some shrimps.
Evolved from what Kevyn taught me on how to acclimate the newly bought shrimps via dripping method. I develop a method to slowly drip water into my tank.
Equipments Required
 Valve x 1
 Aquarium Tube x 2
Container x 1
Setting Up

Setup as the image show.


Evolved from what Kevyn taught me on how to acclimate the newly bought shrimps via dripping method. I develop a method to slowly drip water into my tank.
Equipments Required

Container x 1
Setting Up

Setup as the image show.
- Fill the container with water
- Place the container somewhere higher than the tank
- Make sure the valve is open and fill the tube with water
- Place one end of the tube in the bottom of the container (water should flow out from the other end)
- Turn the valve till water drips at 1 drip/sec
- Done:)


[Ben]
Saturday 19 November 2011
[Tutorial] Making a Java/Christmas Moss Carpet
Hi everyone, have you ever seen Moss (e.g Java, Christmas, Thai SP, Flaming, Spiky) sold at your local fish shop (LFS) in a small cup? Have you ever wondered how do you grow them? Fret not, I will be teaching you how to in 7 simple steps!

1) First you will need a couple of things from DIY/LFS shop. You will need a scissors, a net, a Stainless steel wire mesh some fishing line and of cause the Moss that you will be growing.

2) Next, measure and cut the wire mesh accordingly to the size you want it to be located at.

3) Once done, measure the cloth net with the wire mesh and leave some allowance at the edges before you cut, this is allow you to fold it and sew them together.

4) Place the moss on to the wire mesh, try not to stack the moss otherwise they may turn brown.

5) Next, flip the side where the moss are attached onto the Cloth net. Cut the length of the fishing line sufficiently to be able to to go round the circumference of the wire mesh.

6) As I have mentioned, fold the cloth net into the wire mesh and tie a simple knot at the edge as the picture above. Continue on the edges like you are sewing any other cloth. It will be advisable if you tie a knot at every corner so as to secure the net firmly onto the wire mesh.

7) Viola! the end product! now cut the loose end of the fishing line away to make it look neat!

8) Finally, add the finished product into the tank. And you are ready to see the moss grow!
Have fun!
[Kevyn]
Friday 18 November 2011
[Update] Kevyn's Java Floor/Wall
I noticed this morning that my Java/Christmas Moss has started creeping out of their "net". They are definitely growing fine thanks to a little invention!
I will be posting pictures up tonight of the changes.
[Kevyn]
I will be posting pictures up tonight of the changes.
[Kevyn]
Tuesday 15 November 2011
3 Steps to healthy shrimps
Article Written by Kevyn
There are certain things that you need to look out for in shrimp keeping hobby, but there are 3 most important things that stand out from the rest. Importance of the following will ensure happy breeding shrimps!
1. Temperature
As we all know from our research we know roughly the temperature range which our shrimps are capable of surviving in.
For E.g Cherry = 23-28Deg C // Crystal Red Shrimp = 20-25 Deg C
However, due to the weather in the Tropics, we will not be able to achieve our desirable temperature with the unforgiving heat emitted from the sun. Hence artificial chilling is introduced into this hobby.
Of course you may argue that the shrimps are fine in adapting in a higher temperature than it is suppose to. But have you ever felt comfortable when you are sweating most of the time? That’s how a shrimp feels when they are in a high temperature environment; uncomfortable. This will ultimately affect their coloration and their growth habits.
So ask yourself if you would want to introduce a cooling fan (-1/-2 Deg C) or a chiller(which is very costly) to allow your shrimps to show its full coloration. Which will be your choice? The cost will be your main clue.
2. Water Parameters
How often do you change your Aquarium water? Recommendation will be to do a weekly change of at least 10% - 30% water. Shrimps like clean water which does not have a lot of harmful bacteria and parasites eating into their shells, affecting their health. Every time a water change is introduced, do remember to use “aged water”, where you “seat” the water in a bucket for min 48 hours, to ensure that all chlorine have dissolved.
Do remember to add anti-chlorine as well to speed up the process (P/S DO NOT ADD ANTI CHLORINE DIRECT TO AQUARIUM). There are certain products out there that also helps build a better bacteria colony and breaks down harmful substances like Ammonia. A product that I would recommend will be Mosura BT-9. I will touch more on that if I get requests for it.
3. Lighting
As we know, shrimps from the wild has a natural environment where they have at least 12hours sunlight and night a day. Hence we would like to mimic nature as much as possible by having at least a form of light source for the shrimps. Be it tank by the window or having a LED light hanging over the top of the aquarium will suffice. We would like to have enough light for up to 6-8hrs, this will help the plants in photosynthesis, which helps the tank from breaking down ammonia and improving oxygen content.
Hope this helps in keeping your shrimps happy and alive!
Friday 11 November 2011
[Photo Updates] New Toys in Town

Mineral Rock - Photo by Ben
The Mineral Rock
-Enhance white colour of Shrimps
-Maintain good water quality
-Dissolve slowly into water through ion exchange
-Last up till 6 months
Background
Produced in Limited Mountain at Yasawagi District in Akita Prefecture, Japan
Contains 16 minerals: assilica acid, aluminium, calcium, magnesium, sodium, ferrous..etc

Catappa Leaf - Photo by Ben
Catappa Leaf
-Simulate Black Water Condition
-Enhance Fertility
-Enhance Natural Colour
-Lower PH of water
-Cure sick fish of bacteria infection, speed up healing of damage fins/body injuries
Background
Hand picked leaves from live pesticide-free Catappa trees. The thick and matured leaves are sanitized & sun-baked for 3 days to produce the highest grade product for your tank.Contains Humic Acid and Tannins (anti bacterial, anti fungal), chemical which binds with ammonia, calcium for strong bones
[Updates] Two is better than one!

Feeding time! with my shrimps's Fav Mosura Shrimp Specialty food.

Nice 4 Band S Grade CRS!

Surprise surprise! 2 Berried CRS! As they say, 2 is better than 1 !!
[Kevyn]
[Kevyn]
Thursday 10 November 2011
[Photo Updates] Shrimp Raid!!

Filet Meal - Photo by Ben
Fish and Chips? Fish'o Filet? Seafood plater? Sashimi? Watever... makes me hungry too. Oh i forgot, I'm always hungry:X
[Ben]
[Photo Updates] Really Rili!

Rili Taiwan Shrimp - Photo by Ben
Closed up photo my of Rili. Really Rili?:) Wait... Is it trying to tear my X'mass moss apart?! Nooooooooo!!
[Ben]
[Article] Newcomer For Shrimps
Article by Kevyn
Why Shrimps?
At a certain point of time shrimp keeping will become of interest to you and you may be hesitating to start on this wonderful hobby. So you may ask why shrimps and not fishes? First of all, shrimps are not easier to raise compared to other high quality fishes. They still require Tender Loving Care and your every bit of patience in raising them. With the right amount of care, be assured that your shrimps will not disappoint you with their vibrant colors. The minute actions of the shrimp community foraging on plants will amaze the majority of us. With Aqua Scaping being so popular these days, shrimps will also be an excellent addition to any design that you may think of!
With these in mind, do read up more on shrimp keeping before you start keeping them in your tank!
Tuesday 8 November 2011

[Photo Updates] Baby Lone Ranger

My baby shrimp on the roof of my cottage^^

More Shrimplets on the roof of the cottage^^
[Ben]
Monday 7 November 2011
[Photo Updates] First Berried CRS!!

First Berried CRS "hanging out"! Only a couple of eggs thou.

Grade A CRS + Cherry Red On US Fissiden.
[Kevyn]
[Kevyn]
Sunday 30 October 2011
[Photo Updates] Kevyn's Old Layout

Cherry Red Shrimp on Java Moss

Family of RCS and YFS ( Yellow Fire Shrimp )

Berried Red Cherry Shrimp
Subscribe to:
Posts (Atom)